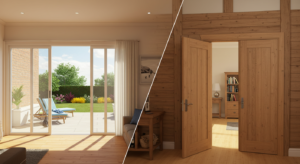
When installing a door without a frame, you’re essentially dealing with a plain wood slab – no hinges or pre-set door knob spot.
It tells you’ll have to do the work of creating those openings yourself.
Unlike pre-hung doors that come ready to attach, going frameless takes a bit more effort.
Make sure you have the right tools, and be ready to measure, cut, and finish as needed for a successful door replacement.
Is it Possible to Install a Door Without a Door Frame?
Yes, it is possible to install a door without a door frame, and this is commonly done using a slab door.
Unlike pre-hung doors that come with a pre-attached frame and hinges, a slab door is a standalone unit without these components.
When installing a slab door, you need to create the necessary openings for hinges and handles, and you may also need to install a separate door frame if one is not already in place.
While it requires more effort and attention to detail, installing a door without a door frame provides greater customization options for homeowners.
Also Read: Which is the Best Quality for Wood Doors?
What is the Difference Between Pre-Hung Doors & Slab Doors?
A pre-hung door and a slab door are different, mainly in how ready they are to be installed. A pre-hung door comes already attached to a frame, complete with hinges and often a door jamb. This kind of door is good to go for placement into a prepared opening, making the door installation process easier.
On the contrary, a slab door is just the door itself, with no frame, hinges, or pre-drilled holes for handles. When you’re dealing with a slab door, you’ve got to do things like attach hinges, make holes for door knobs, and possibly put in a frame separately. While a slab door allows more customization, it does require more effort during installation compared to the ready-to-go pre-hung option.

What Are the Steps Involved in Installing a Door without a Frame?
- Measure and Mark: Use the old door as a guide for the new one, ensuring similar sizes. Place the old door on the new one, mark hinge and knob locations using a carpenter square.
- Cut and Drill: Secure a door knob jig on the marked spot, use the appropriate setting, and drill with a hole saw. Confirm measurements before drilling, including a smaller hole for the latch.
- Hinge Installation: Use a router and hinge jig for hinge installation. Secure the jig on markings, set router depth with an old hinge, and drill. Mark hinge holes with a pencil.
- Attach Hinges: Screw the hinges onto the new door, aligning with the door frame. Slowly tighten the screws, checking the door’s fit. Make adjustments if needed.
- Door Knob Attachment: Carefully remove the old knob if reusing or attach a new one to complete the installation.
Keep in Mind – Useful Tips
- Work Outside for Easy Cleanup: Consider working outside to prevent damage to indoor surfaces and make cleanup more manageable.
- Handle Devices with Care: If reusing door knobs or hinges, remove them carefully to avoid damage.
- Accurate Measurements are Key: Measure accurately for the door knob and hinge placement to prevent mistakes that could render the door unusable. Ensure the door length matches the previous one for a good fit.
- Alternative to Router: If you don’t have a router, a chisel can be used, although it may take more time, especially when drilling hinge locations.
Planning to upgrade the interior door? Whether you’re replacing a worn-out door or opting for a fresh look, it’s always best to consult a professional to provide you with adequate information.
For quality doors and expert door installation services, trust Rochester Door Company today.


